
Monte San Michele (part 1 of 3)
Click here for part 2. Click here for part 3.
In the story describing the bitter battle the Italians had with Austrians to capture the city of Gorizia, the hill San Michele occupies an important place. In the first six Isonzo battles, this place is synonymous with smoke, grenades and unbearable thirst until, after a long struggle, the hill was no longer sustainable for the Austrian units.
This is the first part of a triptych that describes this struggle. In this part we mainly discuss the importance of this hill. The other parts describe the battle and the outcome.
The hill of San Michele is about ten kilometers from the accommodation in Sela na Krasu.
Gorizia is the key to success
The hill San Michele, named after the village of the same name near this hill, is part of the Austrian defense of Gorizia. This city, now located in Italy, belonged to the Habsburg Empire since 1500. And Gorizia was still like that when the hostilities between the Italians and Austrians broke out in 1915.
Although Italy looked particularly eagerly at South Tyrol and Trieste as areas for a possible expansion of the area, the then border from the western part of Gorizia, running north through the Julian Alps, was a thorn in the Italian eye. Because the state border was to the west of the Isonzo, the Austrians could easily cross this river. That would pose a potential danger for the Italians who wanted to “liberate” Triest, because the Austrians could relatively easily command troops through Gorizia to attack the troops advancing to Trieste. This made Gorizia a strategic goal for the Italians. Control over Gorizia meant access to Triest for the Italians.
The Austrians deliberately opted for a defensive war on the Isonzo. The offensive warfare of the Austrians in Serbia was far from prosperous, not to mention the events in Galicia. So it was the goal of the Austrian army command to keep the border area with Italy under control with as few resources as possible. With the fear that the Italians would move to the North via Gorizia, the Austrians used the hills around Gorizia to prevent this bridgehead from falling into Italian hands.
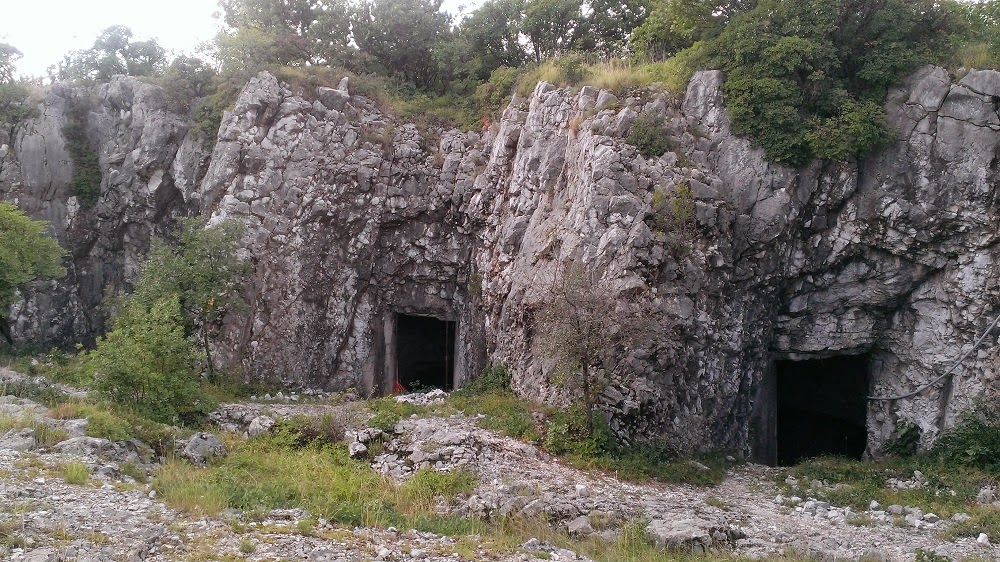
To the north of the city, the hills Podgora and the Sabotin were arranged for the defense. The San Gabriel was manned northeast of the city (east of the Isonzo). The San Marco was located in the east. And in the south-west of the city, the defenders are digging into the protagonist in this triptych: the Monte San Michele.
The importance of San Michele
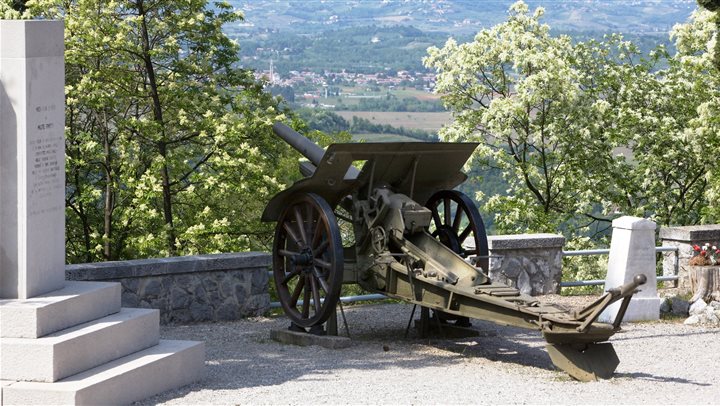
To reach Triest, the Italians had to cross the Doberzo plain. The northernmost tip of this plain is the hill San Michele. Both parties saw the importance of this hill. The Austrians could use the hill, as mentioned earlier, in the defense of Gorizia, but also as an observation post that watched over the Doberdo Plain. Every enemy troop movement could be observed here by the Austrians.
For the Italians the hill was not only an obstacle on the way to Gorizia, but if the hill could be taken by the Italians, they could also move relatively safely over the Doberdo. And not entirely unimportant: from this hill the Italians had a clear view of Gorizia and they could start a possible attack from the hill towards Gorizia.
At the beginning of the hostilities between Italy and Austria, the Italians had some difficulty in getting the army to sufficient strength. Moving the units from the west to the Austrian border was still in full swing in May 1915. The Third Army had the task to take Triest and to push to Laibach, the current Ljubljana. Although some places were taken at the upper reaches of the Isonzo, it took some weeks before the Third Army was ready for combat. It was precious time that the Italians needed to move to the east. It gave the Austrians the opportunity to put the defense in order.
In the next part it is about the battle on the San Michele and how the hill changes owner several times.
Your Blog Reporter
[…] 1922, Monte San Michele has been designated a zona sacra. Here lies memory central for Italy. Only after six […]